Description
About This Video
Transcript
Read Full Transcript
(waves splashing) Welcome. So in this session, we're going to hold the stretches, or pause in the stretches for a little bit longer than the other sessions. Why would we do that? In the Yen practice, which this is sort of based on, it's recommended to hold the stretches for at least 90 seconds to affect the connective tissue. So your muscles, they lengthen in shorter stretches and they lengthen when they get warm and more liquid like.
But in this practice, we're not really going to get warm. We're not doing a flow, we're just kind of hopping right in to deeper stretches. The longer that we hold the stretches, the pause in them, the more they'll affect the connective tissue. So all these fibers that crisscross over each other start to open them up in the time that we spend in the postures. The connective tissue is kind of plastic in nature so it takes a little bit longer to move.
It kind of conforms to the shape that your body is usually in. So it's almost like you're getting molded into the shape that you usually hang out in. For a lot of us, that's like a sitting flextion position. So that's a little bit about it. Let's just hop right in.
For this practice, it will be beneficial to have a couple props, just because of the length that we're staying in the postures. I have two blocks of the same size. You could also use a stack of books, but it's nice to have a couple of blocks. I have a strap which you don't really need but it is helpful for the hamstring stretch. I have a blanket in case you have tender knees and also just to put over top of you in the relaxation.
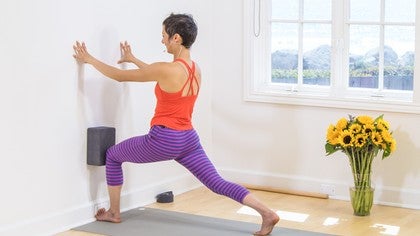
So we're going to come to the front of the mat. I'm going to use the blocks here just to show you that the longer your arms are, the more space that you potentially have in your hips in this posture. This posture is a lunge but in the Yen practice it's called the dragon posture. So shift back, take one foot forwards. Let's take our right foot forward so we're all together on this.
We're going to move around in this a little bit but the three minutes starts pretty much now. So let's shift back and shift forwards. You can move your knee back until you feel like when you shift forwards, your front knee isn't moving too much over your ankle. I should mention too if your back knee is tender and you don't have one of these thicker mats, you might want to put your blanket underneath your knee. So you can play around with that.
So we're going to shift forwards and allow the hips to sink in a little bit. Make sure the back foot is centered, not on a funny angle just yet. Start to allow your hips to relax. You can have some activity in the legs but in this practice, you can let go a little bit more than you might usually. Not so much to hang out in your ligaments but to release a little bit of the muscular tension so that you can actually bypass that muscle tissue and get into a little bit of the deeper connective tissue.
If it's too much for you at any time, you can actually shift back and forwards a few times, and actually that oscillating movement is hydrating for your tissue. So it's allowing fluid to pump through. If you want to, you can come a little bit lower down on your blocks. I'll show you a couple of things. If your knee is happy, back knee is happy, you can actually roll onto your outer knee and onto your pinkie toe, and shift your hips a little over to the left.
See if you can affect a different area of the outer hip and of the quadricep. Then you can roll back into the center and roll onto the inner knee, and actually roll right onto the big toe a little bit more. Some people can actually roll right onto the inner edge of the foot and shift your hips a little over to the right, and see if you're affecting a different area. You can maybe do that a couple of times. You can imagine that every little muscle fiber, every little spindle of muscle, every string of fascia plays a different note.
You're trying to be as diverse as possible in the sounds that you're making. Getting to all the places that have cobwebs on them. So let's get out of here. Three minutes. Sink back.
I like to do a child's pose after this one because it's a counter-pose, so you've just extended your hip and then you can flex it a little bit. It's nice to notice here how different the two sides of your body feel. So let's try the other side. So come on up. Take the left leg forwards.
Snuggle the right knee back and start to shift a little bit back, a little bit forwards in the hips. So we're starting that three minutes now. We might even get into a bit of a hamstring stretch. Just think about the sliding is hydrating your tissue. So stay on the center of the top of the back foot to start.
You can play with coming up a little bit higher. Lowering down. There's a little activity in the legs but there's quite a bit of softening of your hips down to the floor. There's really no prescribed breath here, like in the other practices, or if you watched the breath practice, you could use some of that spacious relaxing breath. It doesn't have to have a sound.
Sometimes if a posture is stronger, like this one is pretty strong, it's pretty feisty for me, then you could use a deeper breath, which might feel good and might allow you to stay focused for the whole practice. So let's do a little bit of that rolling if it feels good. Super interesting what you find out here. If you have one of those compressive lower backs in this position, try to sort of balloon open your lower back muscles. So instead of jamming them in, open them up.
Almost like you're curling in your lower spine. Deep breaths. Let your jaw go. Almost finished. Let's get out of there.
So pull back your hips. Slide your legs back. If it felt good to come into a child's pose, you can get a little bit of hip flextion. Sink your hips down onto your heels. It might feel good to come into a downward dog and move around a little bit.
If you come into a downward dog, which we will get here, anyways just come into it, free your hips up, pedal out your feet, wiggle out your hips. You can lift one leg and then the other, open up the hips if you want. Let's come right into our next one, pigeon pose or swan pose in Yen practice. So right leg back, bring the right knee towards your right wrist, and make sure it's not bisecting the center of your chest, it's over to the right. Heel in towards the groin, and then pick up your back leg and move it back.
We'll start that three minutes now. Let your hip come closish to the floor and if it's way up like this, you have a blanket which you can slide under the hips so that I actually rest on something. If your body is hanging in space with tension, it generally doesn't release, so it's nice to be grounded in those places that are spazzing out. Then walk your elbows forwards. Let the back leg relax.
If you have any knee stuff, inner knee stuff, outer knee stuff in this bottom leg, prop yourself up or have a little activity in the heel of this right foot. I like to shift a little side to side here. So you can stay centered like this. I'm going to give you a couple of options to play with. So as the hips stay grounded, walk yourself so that your heart moves towards your foot.
So your hips stay where they are but you're kind of doing a side stretch with your torso. You can hold your head. You can hold your jaw in this position. You can let your arms reach out and let your head come down, really grounding your right hip. You're doing great.
This one gets everybody. So that outer hip, relax. There's all these external rotaters around the head of your femur, they're like octopus tentacles holding tight. So as you breathe in, imagine where the center of your hip joint is, the nucleus of that, and see if you can just relax it a little bit with an exhalation. Let's come into the center.
One more variation. Just come a little bit over to the other side. This time putting more emphasis on dropping your left hip down and kind of rolling it down towards the floor. Hopefully you're also getting a little bit of a side stretch into the two sides. Then let's come back into the center.
Tuck the back toe and slowly use the strength of your belly actually to come out of this so you really don't put too much tension in that leg that you just stretched out so much. It feels good maybe to come into a child's pose here for a couple of breaths or into a downward dog. If you're in a downward dog or child's pose, be creative with little movements that feel like they're erasing the last posture. Improving blood flow in the area that might have been restricted. If you're not in downward dog, come on into it and we'll switch sides.
So left knee to the left wrist, pull back a bit with the knee, with the buttocks. If you're still really lifted, get some props underneath the hip, and walk the elbows forwards. Keep a little activity in the left foot, especially if there's knee stuff or prop yourself up so that you don't feel like you're hanging out in space and the suspension is tension. You might walk a bit forwards here. Maybe little wobbles side to side.
You can either stay in the center or keep the hips where they are with an emphasis on grounding the outer left hip. Actually feels good just to give it some weight with your hand and do a little side stretch. Like your heart over the foot. So again you can hold your head, which might be nice. You could also use a block to place there to rest your forehead on.
Notice if your shoulders are taking on what's happening in the hips. So relaxing the shoulders and the jaw. Let's come into the center. Maybe a little bit over TO the other side, but keep more emphasis now on the outer right hip moving down. Make sure the side movement isn't making your back feel clinched.
So you might want to breathe into your back. That little activity in the posture can actually be sort of like a tiny little bit of lifting the lower back away from the floor, which will affect the way that you feel it in your hips. Let's come out of there, so walk back to the center, so connect to your belly. It's like someone is poking you in the lower belly and you want to come away from that. Pull back, keep your leg relaxed.
Come into child's pose or any movement that feels like you'll get a release. A bit of blood flow. Then we're going to come to move ourselves so that we are on the side of our mat like this for a wide-legged posture, dragonfly or konasana. So you don't have to take your legs too wide for this. If you did have those blocks, I'll show you, if your hip flexors are super tight, this is a super nice variation to relax those hip flexors.
You can even roll your inner thighs down, your outer thighs up, place your fingertips behind you. This might just give you a bit more freedom in the pelvic tilting, coming forwards. A little bit more ease in your lower back. So we'll start the three minutes now. That's an option.
But if you don't need that, and you feel pretty upright, maybe you do that rolling of the inner thigh in, and the outer thigh up which helps you to be more on the frontal edges of your sit bones. You might just stay here. I don't even mean to say just stay here, this is a lot. It might feel okay to actually walk forwards a little bit. I like to keep a little activity in my feet in this one.
I also like to feel that the toes are pointing straight up. That's going to give you a little bit of a friendlier rotation, or a neutral really feeling in your leg. So that when you come forwards, you can keep a little bit more neutral in your hips and your spine. So we're getting into this duct or inner line of the legs. Some people can of course come down further.
Use a prop. But I'll give you a couple variations in this as well so you can keep both hips grounded, walk yourself over to one side and spin your belly over to that leg, and breathe into your side back, lower back area. I even like placing my hand here and pressing that thigh away and down. That is super nice. Walking back through the center and maybe trying it on the other side.
Spinning the belly. You might be quite a bit more upright in this posture. Even upright, pressing down on the opposite thigh, grounding it and leaning a little to the side is really nice. So let's come out of this posture. Lean a little bit back, grab on under the knees, and draw them in, and just curl in a little bit here.
We're going to roll right onto our back. You may need a strap for this one. So we'll roll down, and start by just bringing the right knee into the chest, left leg bent. Then reaching the heel up into the air so you're coming in to the back of the leg. We'll start the three minutes now.
So you have the choice to keep this leg bent which is a little less stretchy, a little less intense or you can slide it towards straighter, staying on the center of the heel. If your leg is hesitant to come to a 90 degree, you can bend and take a hold of the strap around the ball of the foot, right underneath the toes, and then roll your hands around the strap once or twice so that the weight of the arms is dropping down, the shoulders are shrugging, a little bit away from the ears. And down. If your knee is quite bent, just oscillate a little bit here so you can bend and extend a couple of times. Leaning up through your heel.
I also really like to just rock the leg side to side, especially rocking it across the body because there's a really nice outer hip I-T band feeling there. Check in with your jaw, is it fairly relaxed? Your shoulders. You're doing great. This one can be a lot.
Another thing to note is if your lower back is just relaxed and neutral, so not pressing into the floor, and not over-arching but just relaxed. Just right in the lower spine. A few more breaths. So let's bend. Release the leg.
Slide it out, let the legs come a little bit wide and just rock the legs back and forth. Close your eyes. Feel the difference between the two sides. I feel longer on my right side right now. Let's switch sides, so starting with a foot bend.
Squishing the knee in. You can stay here. Hooking around the ball of the foot. Getting a good, relaxed grip. So your shoulders can relax down.
Maybe flossing a little bit, and we'll start the three minutes. Beaming up through your heel, maybe straightening the right leg. Maybe keeping a little bend in this leg. Wait for the willingness for something to change because sometimes, I mean a three-minute hold actually isn't very long in the Yen practice. It's kind of on the shorter end of things.
A five-minute hold, if you like this practice, sometimes you can set a timer and do a five-minute hold with these postures, and see if there is a tangible shift in the tissue, in the shape, or just in the way it feels. So swaying maybe a little bit. I love to sway across the body, for the outer line of the leg. Spine is in neutral. There's a little activity in my right leg just to stay on the center of the heel.
If any of these holds are too long for you, you can just come out and lay there, and relax and feel the residue of the posture. It's actually my thoughts that this Yen practice is quite an advanced Yoga practice because you really have to sit in sensation for a while. Let's come out of this side. Let the leg slide out. Just close your eyes.
Maybe take your arms over your head or out to the sides. Just notice how it feels to come out of the posture, which is really the best part. Let's close with a twist. So we're going to stay on our backs. Plant our feet.
Press into the feet, just let the sacrum to hover off the ground, slide it to the left. Two options for the legs. You can bring the knees together. If you have sacrum mischief, then you could place a block in between your inner knees, which will help to stabilize the back of the pelvis as you come over to the side. If your sacrum is pretty happy, a deeper feeling of stretch of the back of the pelvis is to cross one leg over the other and then let the legs come over to the side.
That's quite demanding on the back of the pelvis. So you can choose which one feels that you could actually hang out there for three minutes. When I come over to the side like this, I like to press my elbow down, pick up my chest a bit by pressing into my skull and my elbow, and then rotate my rib cage a little bit and spiral it around so that my shoulder and my upper back comes a little bit closer to the floor. That might even bring my knees up a bit. Right now I'm actually going to put something under my bottom knee.
Because then I can relax the legs a little bit and take the arms out to the side. You might like the feeling of it without the block. You can look up here. Sometimes it's nice to get a cervical twist. Some days if the mid-back is not on the floor, it's upright like that and you're kink of cranking your shoulder, it's usually not as nice to turn the head over to the side because it sort of over-rotates the neck.
But if your mid-back is on the floor and your left shoulder is touching the floor, then it's kind of nice to pick up your head and rotate it and look over the other side that you check in. Now I'm feeling like I can let this prop go. That's something that may happen. Extend your hips away from your armpits. Then just relax in this shape.
Last few breaths. We're going to slowly unwind. So if your legs are twizzled up like this, just unhook them to come back into the center and center your pelvis. I actually learned this from a cranial sacral therapist and thought it felt pretty cool, but it's a little bit silly too. You just lift your pelvis and drop it.
You don't really lift it that high. See if you can totally relax. Totally drop it. If there's little A-symmetries in your sacrum, this actually feels really good. Kind of sets everything into place.
So let's press into the feet, if you're ready. Come over to the other side with the hips, the shoulders don't move. Pick the way that you want your legs to be organized. So with the block maybe in between, or a blanket. I'm going to show the eagle wrap twist.
Let your legs fall over to the other side. I want a prop there first. Then I like to press into my elbows, press into my head, lift up my chest and roll it so that the right chest is more on the floor, and then open up the arms. Your feet might not look like this though. It's fine to just have them relaxed however they end up.
Make sure you feel good in the back of the pelvis. Something to check in for in this posture is that you're not rounded and kind of flexing. That there is a feeling of the hips moving away and that there is a neutral softness in your lower back. So you can rotate the neck and just check in how your neck is doing on that side. If it feels easy to rotate.
I actually feel like I can move my prop now. Sometimes I actually like to float this arm that I'm twisting towards, stretch it out and down, and place the mid-back on the ground. So just a few more nice, long breaths here. One thing I learned about twists is that they do a beautiful job of lengthening your psoas muscles. Your deep hip flexor muscles.
So let's unravel or unwind. Come into the center. If it felt good to do those little drops, for me it feels great. Might also feel good to widen your feet and do a few windshield wipers. Dropping, kind of rolling onto the edges of the feet.
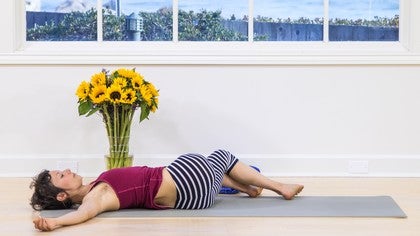
So we're going to lengthen out into savasana here. If you feel lower back clinching at all, it might be nice for you to actually keep your feet planted. That might feel good and relaxing for you, or you can straighten your legs out, and allow the pinkie to the side of the foot to drop down towards the floor. You can open your arms out a little bit away. I'm not going to do it right now, but if you have a blanket, throw it over the top of you for a few minutes.
Because not just for the warmth, but also just for the weight is grounding and really relaxing, and you may feel really relaxed after this practice. So let your eyes close and observe your body. Observe your mind-body. In some circles, that isn't even a hyphenated term anymore, it's actually just one word without a space, mindbody. Insinuating that you can't actually separate the two.
There is even a field of medicine called psychoneuroimmunology which studies that the brain, especially the emotional centers in the brain are intimately affecting the nervous system. So the nervous system does not live in isolation from the emotional centers in the brain. So for the last few moments here observe the mindbody with wide open awareness. You might want to stay here for longer. But for now, I mean you could pause it and stay here for as long as you like.
We'll wiggle the fingers and toes. Stretch the arms over the head. Roll over onto one side. Take your time to come up. It was really nice to practice with you.
Thank you.
Yoga for Athletes: Preparation Practices
Mention
 |
Lydia Zamorano (Teacher) |
 |
Sandra Židan |
 |
David G- |
 |
Erika H |
 |
Emma S |
|
|
Tracy C |
|
|
Jennifer D |
|
|
Chrissy |
 |
Stacie C |
 |
Renee R |
 |
Joan J |
 |
Frederic M |
 |
Silke S |
 |
Lori |
|
|
Silvana G |
 |
North F |
 |
Brittany A |
|
|
Maria Elena D |
 |
Aparna S |
 |
Cameron K |
|
|
Angela K |
 |
Heike S |
|
|
Paul C |
 |
Wynter |
|
|
Katherine H |
 |
Tesa Urbonaite Dunn |
|
|
Melanie B |
|
|
Clara D |
|
|
Sheri B |
Comments

Glad you appreciate the little taste of the Yin practice. I hope it's a nice way for some people to get their feet wet. Love. Lydia
Lydia

You need to be a subscriber to post a comment.
Please Log In or Create an Account to start your free trial.
