
Description
About This Video
Transcript
Read Full Transcript
Namaste and welcome back, good to be here with you. In this practice we'll be using the wall again, but from a whole different perspective. New ways to open up in our standing and sitting poses. Looking forward to sharing this information with you. We're going to start in a sitting position, similar to our session one, and we'll start with a block, right up near the wall maybe an inch or so away.
And we'll start in cross legs. Bring the legs in tight toward the block and the sacrum and tailbone up against the wall. And then like we've done before, roll open the shoulders and chest and bring your head back to the wall. So we want to take full advantage of that gift of the wall in these poses. Opening up the chest, opening up the shoulders.
So let's pause in this pose here to feel that space in the body. Take a few nice centering breaths. Begin to experience and feel the sensations of the body. And then we'll ease into our next poses. So we'll start on our hands and knees in an open knee child's pose.
Let's take the block out of the way. So we'll go wide knees, feet together, and we'll stretch the arms forward. Bring the arms out about mat width. We'll start here. We call this pose, Adho Mukha Virasa, a downward facing hero pose.
A couple of things to bring to your attention here. First is the way I'm using my arms. So there's a lot of activity in my arms. Palms and fingers are spread wide and I'm pressing my palms down and forward away from my knees to lift up those arms. This helps me to activate the shoulder blades and elongate the chest and spine.
Take a few more breaths in this child's pose. So easy breathing as we get ready for our deeper poses. And then let's walk it back. We'll come into a hands and knees position for a few easy cat and cow to mobilize the spine. Take a breath in to prepare.
On your exhale, spine goes up, rounding the back, tucking the tail. Inhale let the back come down, bringing the arch into the spine. Exhale spine going up. Inhale spine going down. Remember to get that movement in your shoulder blades as well.
That's an important part of the spine. And it needs that movement after perhaps a few hours of sitting or driving or maybe there's stress from the day. Let's get one more. Exhale spine goes up, inhale spine comes down. Our next pose will be a downward dog.
So once again, we'll lift the knees, heels up nice and high up the wall, toes forward. And we press the heels into the wall to lift up the thighs. Look for that feeling experience when you press your heels into the wall that your thighs become active, thigh muscles that become active and it lifts the hips up and back. And then coming down, take a little pause. Remember if you find yourself slipping in the dog pose, you can always grab hold of the sides of the mat to make sure you're nice and stable and safe.
One more time, dog pose coming up and we'll hold here pressing the heels into the wall. Get the firmness of the thigh muscles and feeling the hips lift up and backward into the wall. Get that full spinal length. Let's add to this second dog pose here by starting, coming forward over the wrists, bring your knee into your chest. Take a breath in and as you exhale, let's take the leg up the wall.
Just explore this first one and see how it goes. And then again, coming in, now we'll inhale, knee to chest and exhale, extend. Each time you take the leg up, see if you can press your heel, that lifted leg heel higher and higher into the air. Again, bring the leg in. And one more time, let's go up and I get a special bonus to work with.
We can start to walk the hands in and the foot higher, hands in and foot higher, of course, according to your capacity until the possibility exists where you can press through your arms and maybe lift your standing foot off the ground for three, two and come down. Walk the hands out. Let's come down to hands and knees for just a second and take a little rest. Cat and cow, wonderful way to recover. And that can take some building into over time as you build the strength in the shoulders and the mobility in the hips.
Let's get the second side. Coming again into dog pose. We'll come forward over the wrists, knee into chest. Take a breath in and exhale your way up. Find that wall with your lifted leg and let's go again.
Knee to chest, a breath in, exhale, take that leg up and begin to powerfully look for straightness in that leg. Push your heel toward the ceiling. Again, bring it in, a breath in and exhale your way up. Go on stretching that lifted leg heel higher and higher. And if you're up for it, we'll walk the arms in, heel goes higher.
Walk the arms in, heel reaches, arms press and the possibility of lift off for three, two, one, come down and let's walk out. Once again down to hands and knees. We'll do a few recovery cat and cows, breath out, breath in and breath out. Time goes down, breath in. Ah, the body's calming down now.
Next we'll come up for some standing poses. We'll want to bring a block for these standing poses. So we'll start standing with the right foot against the wall, left leg away from the wall and the block on the outside of the foot. We'll take just a few seconds to talk about this back foot and how it's important in the wall in this particular series. We want to press the outside edge, the pinky edge of the foot down into that corner.
That gives a wonderful lift to the inside of the back leg and helps the whole body to open. These standing poses are really built from the foundation of the feet. We'll start with triangle pose, pressing the pinky edge of the feet straight on down, take a breath in and slowly come out into your triangle pose. But keep that edge of the foot pressing, pressing, pressing, pressing. We'll find a block.
And let's take our awareness into that back leg foot, press down to look for an opening revolution there in the right hip. Take an inhale, bring the block with you as you come up. Turn the feet in and we'll do the second side. Same idea. This time left foot at the wall, right leg out, block beside the ankle.
Pressing down on the pinky edge and the back edge of your foot, arms out and ready, inhale, exhale. Press the outer edge of your left foot and come to your support. Remember at any time you can change the height of your sport or if you don't need it, you don't need it. And then pressing the outer edge of your left foot, bring the block, inhale and come up. Turn the feet in and we'll do the first side again.
We'll get a few times at these to really experience how this work at the wall helps to open the poses. Right foot against the wall, left leg out, stretch your arms. Pressing the outer edge of the foot, feel the lift that that gives to your inner right thigh. Breath in and exhale, here we go. Pressing the outer foot to lift this thigh toward the wall.
And let's hold it right there. Keep pressing the outside edge of your right foot to feel the lift of your right leg up and to that wall. That's what pulls the pelvis into its proper rolling position. And then inhale and come up. And take it one more time, other side.
Left foot to the wall, right leg turned straight out, block at the ready. Stretch the arms and let's get that feeling, that downward cutting of the left outside foot. Inhale and exhale your way in. While you're pressing into that wall, we'll take the pose. So you're focusing your energy, your awareness into the pressing of the foot to get the lift of the left leg, and inhale, come up.
Turn the feet in, walk the legs together. Our next pose is side angle pose. We'll start again with the foot at the wall. Nice wide four, four and a half foot stance, block on the outside of the foot. Inhale stretch the arms and once again the work we're doing pressing the outer edge of the foot.
Exhale, bending the left knee and take your hand down to the block. So on pressing the outside of your right foot down, inhale and sweep the arm over your ear. And so if you want to feel how this helps the body open in the pose, disconnect the foot a little bit from the wall and you feel the whole body start to collapse down. And then recharge the connection of the foot into the wall and you'll feel this internal bodily lift and space starts to come. Now come up, turn the feet in, let's try it on the left.
Left foot at the wall, block on the outside of the right foot. I think you're starting to get it now. Outside of the left foot pressing down, we bend the right knee. From the pressure of that back foot we'll inhale and take the arm over. Take some breaths while you experience the strength of the left leg helping to support open the pose.
And then inhale and come up, walk the feet in. One more time each side. Outer right foot down, inhale and exhale, take it over. So I can add one extra little cue into this, sacrum and tailbone should feel like they're reaching toward that back foot heel. This helps to bring the whole torso further into the pose.
And inhale and come up, second side. Stretch out the arms, big breath in, outer edge of the left foot pressing, exhale and let's take it, arm all the way over. Here you can see and I can point, sacrum and tailbone should reach towards that left heel. That reaching is what turns open the trunk, that gives the internal space in the trunk. And then inhale, come up, turn the feet in, walk the legs together.
Let's just get a standing mountain pose for a moment, let the body recover and so that we can feel the gift of the work. Our next pose is half moon. A new experience of half moon, we're going to place the block and there's a little bit of trial and error to get to the right position here. We're looking for a vertical standing leg. So I come up and place my lifted leg way up the wall, got it pretty close here and the block out far enough that I feel like I'm supported.
So I push the outer edge or in this case the pinky edge of the foot into the wall and that helps give me the lift. You can see that lift and turning happening in the body. That lift and turning from the leg transfers all the way up to my trunk plus I've got the support of the wall so I feel like I'm safe to open up in the pose. So wonderful to use these props. Let's hold this one for a little bit.
Feel the lift. At any time you could try taking that energy out of the lifted leg and you feel it just sinks. The whole body sinks so we'll recharge and open. And then you come down, lifting up, we'll get one more on the other side. We'll start left foot at the wall and again a little bit of trial and error to figure out your proper distance from the wall so that we have mostly a straight vertical standing leg.
Two things once again, we're pressing the pinky edge of the foot into the wall to energize that standing leg and the sacrum and tailbone pulling towards that heel. And that gives that deep opening in the torso. Let's take the top arm up for the full pose. A few breaths, experience that inner space and then gently come down and we'll come up. We're going to get rid of the block for now and try a few of the warrior poses from this perspective.
We'll have the right foot against the wall, left leg out. Pressing the outer edge of the right foot down, we'll stretch the arms and don't worry if your arm hits the wall, that's perfectly fine. Press the outer edge of the foot, a breath in and exhale, bend. So this arm against the wall actually gives us the feedback of how to begin to open the chest, how to turn and spiral the bicep up to open the chest. And again the outer edge of the right foot helping to support the back leg.
And then coming up, turn the feet in, walk together, let's get the second side. Left foot against the wall, right leg out. Stretch your arms and prepare those feet, that's the foundation. Outer edge of the left foot, big breath in and we'll exhale into the pose. Here the sacrum and tailbone action is straight down.
We gently tug that sacrum and tailbone straight down to get the lift into the torso. A few more breaths, feeling the support of the pose. And then we'll bring it up, feet together, come all the way in. Next is warrior one. In this particular pose we're going to start with heel up the wall and then turn the legs out.
We're going to turn the trunk directly forward and then we'll enter the pose from this way. In this work, just like in our downward dog, you want to press the heel very firmly into the wall and that gives the lift and support to this leg. So we'll start with two straight legs, arms up, powerful support of the right leg. Breath in, exhale and bend in. So as I come in, I really work that heel to the wall so I get the support of the back leg.
As always you can see what happens if you undo that back leg connection, the body sinks. Recharge it and the body lifts from the inside and that's what gives the quietness of mind. Come out, turn it in, heel toe together, we'll do the other side. Heel up the wall, nice long stance, four, four and a half feet. Let's start with the energy into the back leg to feel the body lifting from the inside and then arms up.
Then a nice big breath in and exhale your way into the pose, keeping the energy of the heel to the wall. And this heel energy is not just pushing the heel from the ankle, you're pushing all the way from the hip to the ankle, one line of energy. Look for that feeling, a couple more nice long breaths and then come up. We'll turn the feet together, it's time for a recovery pose. I think you're going to love this.
Feet a little bit apart, we're going to face toward the wall, bring your hands down, certainly find a bend in the knees to start, we're gently going to tuck our chin and bring the back of the body into the wall. So you let your body weight come into the wall, you can just drop the arms and hang there and let the body recover from the strenuous standing poses. Take a few breaths, it's quite a restful pose to be in. Relaxing and lengthening the neck and the legs shouldn't be too far away from the wall so you just feel like you're sort of plowing into the wall. You want to feel like you're just gently resting on the wall and you can see I'm creeping my feet in a little closer so that my back feels like it's elongating, letting go down toward the floor.
We'll take a few extra breaths here and a few last breaths and then we'll work our way out. Come up nice and slow and we'll take the body out, walk backwards and let's place the hands on the knees and begin to lift the chest and head. We'll let the blood flow regulate itself and then come all the way up to standing. For the next two poses we're going to use a strap to help us get a little deeper in. Please take your strap and we're going to be using the wall again to get that same great assistance in the poses and I'll double mine over just so I have better control of this strap.
We'll start with the right leg into the wall. So you'll find a distance, a little trial and error, you'll find a distance so that your standing leg is mostly vertical, maybe a little bit behind you is fine, so you feel like your body weight is going in toward the wall and we're going to bring the strap around the foot and place it up the wall. Best way to work here is with two hands. So I want to take my arms full length out on the strap and then I'm going to use the whole length of the arm to pull my body upright. Let's undo that action again, we'll relax a little bit and again, from my arms it's as though I'm pulling the leg backward into its socket, setting that there and then lifting up.
I'm allowing the crease of the hip to go deeper and deeper as I open in the pose. Spinal strength, mobility for the hips and lifting in the chest. And then we'll bend the knee and come down. Let's do the second side. Left leg coming up, we'll take the strap at the bottom of the foot and we're up.
So once again, two straight arms holding at arm's length, charge up both legs reaching into their wall and floor and then we're going to pull the arms as though it will pull the leg straight back into its socket. The both legs are reaching into their respective spots, floor and wall and the arm is resisting back. And so the net result of that really is that you get to relax. You get to relax in that hip joint so it can fold properly. A few more breaths and then letting go and then we get to do it from the side.
So take the strap around the foot again, still working with a vertical leg. We'll bring it up, there we go, just a little adjustment and now we're ready. So I'm going to slide my hand down the strap just like this and holding on. A few things here. This is triangle pose turned up at about 90 degrees.
So same types of actions. We're pressing down through the standing leg, reaching to the wall with this leg. And then remember sacrum and tailbone, gently pulling down towards the bottom foot heel. Let's finish that with some arm action. I pull the arm into itself, into the shoulder to lift the chest.
And then if you'd like a full body pose, you can raise all the way up. And then we'll do the second side. Come on down. Hopefully you saw where your standing leg foot was. We'll take the strap with the foot again.
Leg up the wall. All right. Standing leg stretching right down into the ground. Wall leg reaching into the wall. Sacrum and tailbone gently pulling straight down so our bottom doesn't poke out.
We want to have that sacrum and tailbone down. This is what helps open the groin. And then I pull with my arm against the strap, which helps me to turn open the chest and allow the hip to actually fold. Let's express the full pose and take a few breaths here. Feeling the opening in the groin.
And then gentle release. Let's let that go. And we can put the strap away. And we'll just take a moment in mountain pose. Again feeling how our body is opening.
Our next pose is known as prasarita parottanasana. We're going to start by stepping outside the mat, bend the knees and take the hands to the floor. We'll then walk the heels back into the wall, right up into the wall, so that we can feel the support of the wall against the backs of the legs. Now you may need some blocks here. If your back is quite round in this posture, having blocks underneath your hands would be very, very helpful to open up the chest in this pose.
So let's start with the foot action. That's where a lot of our work today is focused. We're going to press in the very back of the heel, straight down into the floor. That gives the straightening of the legs and the power of the legs to touch the wall. Pressing into the heels, find activation in the leg muscles.
And then the net result of the work of the legs is that the trunk just knows to come forward. It knows to extend. So that's how we're taking this work here. Heels down, legs pressed to the wall, trunk lengthening and holding here for a few more breaths. And so the mind, very quickly, it goes off of the work that it's supposed to do, so we have to recharge the mind into the heels, into the legs, into the trunk.
And then, to come out of the pose, bend your knees and you can heel, toe, heel, toe, heel, toe yourself all the way in. Hands on your knees for just a second, let the blood settle down, and then come all the way up to standing. Next pose, Vrksasana, tree pose. Here it takes a little bit of moving around a little bit to find the right position. But we're going to help the foot all the way up into the groin and place the knee into the wall.
Now we want to be as close to standing on our own effort as possible, so we're not just totally leaning into the wall. But this is such a wonderful way to not have to worry about balance and we get the great effect of opening the hips. So I'll press the pinky edge of my foot a little bit more into the thigh and the thigh presses toward the foot. They go together and the net result, it gives me a nice openness in the front of the pelvis. Then let's take the arms up for the complete pose.
Bottom leg pressing into the floor, sacrum and tailbone down, opening the right groin, right leg, full lift of the body. And then come down, take a little rest, pause, and we'll do the second side. Bringing the left leg up, please do feel free to assist that leg as high up into your right inner leg as you can do. Get that position so that your standing leg is mostly vertical and you feel that there's good contact of the knee into the wall. So I press down into the back of the heel, I help take the sacrum and tailbone down to open the front of the pelvis and then I reach the left leg into the wall and then we take the full pose up.
Take a few breaths here and cycle through those actions in the body, standing leg to the heel, sacrum and tailbone down, opening the left leg to the wall. And then release your pose, bring the legs down, let's pause and tadasana for just a moment to feel the body again, the space that's starting to open. And then from here, we'll take a recovery downward facing dog. Let's come down to the mat, place the hands, and as we've been doing, take those heels against the wall so we can get that wonderful support and lengthening into the body. Press the heels into the wall, feel the thighs firm and move into the wall as well, up and back, hips move up and back, and our spine gets that wonderful, wonderful length.
And this is how we can recover the body from the work of the standing poses, few more breaths. And then let's bring it down to the knees and take an easy child's pose. You can either fold the arms and rest the forehead or rest the forehead on the ground. And let's walk our way back up, and we have an opportunity to do another headstand. So we'll take the blocks again as before and bring them to the wall for that wonderful support.
Once again, you can use two blocks if you only have two, and if you do, you turn the top block upright. I'll show with a three block setup in case you have that available to you. Three blocks, one standing, two stacked flat on top, we'll interlace the fingers around the back edge of the standing block. Place my elbows shoulder width apart, curl under the toes, lift the knees, and I walk in. Starting here, pressing the forearms into the floor and lifting the shoulder blades.
Relax my head, relax my neck, and let the blood pressure begin to settle itself. Remember you're more than welcome to stay here, your head might touch the floor or it might not, but the neck should be in no way stressed or feel a lot of pressure. And then for those of you who have the capacity to go all the way up, you can bring a leg up and work your way into the complete pose. Here again, my head has very, very, very little pressure on it, and what I'm learning from the block is how to lift and open the chest. It's quite common for the shoulders to want to fall backward, in this case, backward is toward the wall, and that collapses on the neck.
Here the neck is very long, shoulders are lifted, and the pose feels actually quite refreshing. Let's take a few more breaths here, and we'll try to stay for about a minute, coming down anytime you need to come down. Like we've been doing, reaching the heels, in this case toward the ceiling, to get that inner lift of the body. And to come down, you can slide one leg down the wall, begin to round your body, and come down. Take a child's pose, and recover.
All right, let's work our way back up, and we can put away the blocks, all but one actually. We'll set that block flat down about an inch, inch and a half away from the wall, and we're going to take a seat there, and this will begin a little bit of our recovery from our work, and also help us towards our next pose, which is going to be a back bend. So here we're going to open up the groins a little bit, and again, get the lift and openness into the chest that we're going to then take into some of the back bends that we're going to do. So here I roll the shoulders back, I allow that chest to open, and I take the dorsal spine in. That's that middle region of the back, I gently draw that in.
So it begins to prepare for back bends. Now, if your arms will reach the floor, you can use the floor for a little support, and opening a little further. If not, don't worry about it. But if they do reach the floor, you can press straight down, roll the shoulders back, and go on opening the chest. And let's let the breath be that levering open for the chest that will take us even further into the back bends.
All right, and then bring the feet out a little bit. And we'll come in to the wall for camel pose, Ustrasana. You're going to walk your body right up into the wall, so the fronts of the thighs touch the wall, you're going to be up close and personal to the wall. And you want to come all the way in so that you feel even your belly button is touching the wall. We're going to start with the hands on the hips, and begin to peel back the arms and shoulder blades first, and then relax.
Arms and shoulder blades pulling back from the wall, and then relax, and we'll add another body part. Arms, shoulder blades, collar bones. And come back, but I want you to keep the pelvis and navel at the wall. Arms, shoulders, collar bones, chest. Let's keep it going, arms, collar bones, chest, but the navel is still at the wall.
Maybe the bottom of the sternum starts to come back. And then we'll sit back for just a moment and take a rest and let the legs recover. This work will definitely start to fire up those quad muscles. You begin to feel the heat developing quite quickly. Let's try it again.
Come back up, legs, knees, hip width, hips into the wall, navel into the wall, hands on your bottom. We'll start with arms, shoulders, collar bones, and then come back to the wall, arms, shoulders, collar bones, sternum. Come back to the wall, we'll go a little bit further now, and maybe we can take the hands down to the feet. So we go arms, shoulders, collar bones, sternum, and start to come back holding the navel at the wall for the last longest point. If it's available for you to take your hands to your heels, please do.
And we can start to bring the body further and further back, but the tailbone should go further and further in toward the wall. And we can take the head back for a final part of our pose. Holding for five, four, three, two, and work your way back up. And recover pose. Come down and take a rest.
A few breaths. And from here, we'll take that back bending experience into bridge pose. So coming on down, set your feet about hip width apart, and we'll grab hold of the mat. This will again help educate the shoulders for how to turn under the upper back. We'll start by lifting up the hips.
Holding onto that mat, you want to turn the arms outward as though to the sides of the room so you feel your shoulders want to tuck under, and we move the chest side to side and allow them to tuck. Press down on the feet. And just like a moment ago, you did Ustrasana in the wall. We press that sacrum and tailbone toward the ceiling. And then let's undo the shoulders.
Come down and rest. And we'll do one more bridge. Press the feet, turn the arms, tuck the shoulders, and then we can press the feet a little bit more. Bring the sacrum and tailbone straight up. We say middle buttock straight up, and then pressing the arms to open the chest.
A few breaths. And then come down and rest. And we'll take the knees into the chest for a little recovery from the backbends. A few breaths here. Open feet to the floor, arms out, and let's take the feet mat width and just gently, softly, windshield wiper a little side to side.
And we'll come to center. Turn to the side, press up to sitting. Here we'll take two blankets and come into Viparita Karani again. Two blankets. We'll slide into the wall.
We want those blankets about two or three inches away from the wall, and that'll help us settle our pelvis in. The practice is to get at the very side edge of the blankets. You want to tilt yourself toward the other end of the mat, side lying, tilt in, so that both buttock bones end up pointing at the wall. Then you turn directly up. A little bit of shifting to make sure you're centered, and that the blankets come up about as high as the kidneys, but no higher.
And it's time to settle in. So in this pose, again, we want to have a nice, soft abdomen. Shoulders and chest open, and so we take that little movement of the shoulders again, gently tucking under the shoulders so the chest is open. Arms are relaxed, hands are relaxed, and feet and legs are relaxed. And the more often we practice inversion poses like this, it gives a strength to the circulatory system as it has to pump that blood all the way up to the toes.
Normally gravity can help do that. And another nice factor of being inverted is that it helps calm or lower the blood pressure and brings a relaxation to the body. It's a great way to recover after a lot of traveling or after a long day at a desk. So let's let the eyes close. You could say that you're sort of allowing your energy to retreat from the periphery towards the center as the hands go soft, feet and legs become softer, abdomen becoming soft, throat and face becoming soft, until really only the breathing is the thing that your attention settles on.
As a preparation for understanding pranayama, we can begin to just observe the flow and movement of breath. For no other reason, just for now, just to watch and quiet the mind. From there we'll settle our way back away from the wall, bend the knees and gently help yourself to work your way back away from the wall until your bottom comes down to the floor and you have enough space to softly cross the legs and rest them open on the blanket. Once again let your arms a little away from the body and you can tuck the shoulders under to help support the chest. And this will be our shavasana position again.
Allow the hips to relax, the shoulders, arms and hands to soften and do let that energy feel as though it's retreating from the periphery toward the center such that the body becomes calm, soft and still, just the breath. And if the mind starts to wander, you just bring it right on back to watching the breath. It's lovely to stay for as long as you like but if you're ready to come out, we can bring the knees up and together. Let's draw them into the chest for just a few breaths and we'll take a soft turn to the side, rest your head on an arm or blanket and then before you come up turn a little further toward the floor and then press your way up to sitting and let's take a final few moments in a sitting position just with a quiet mind. Resting the back against the wall again like we did in the beginning of our class.
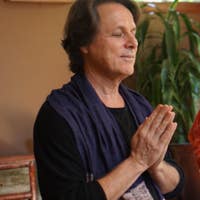
Let your eyes close. It's been wonderful having you here with me. Namaste. It was a fantastic day.
Aligned and Awake: Nathan Briner


Comments


You need to be a subscriber to post a comment.
Please Log In or Create an Account to start your free trial.
